We at Innoventry believe that every business is unique. Henceforth, we have developed special software segment for Restaurant Business. This software version will ease the way of billing, accounting and stock keeping for the restaurant owners and managers. Lets dive into the amazing features the software has to offer for its users.
Restaurants usually have two modes of operation. First being, the Dine-in and other is counter orders which includes online or over the call orders.
Dine-In Business Mode #
To start with, every dine in restaurant has a table layout in the premises. In the Innoventry Software we can configure table layout to take orders & create bills for specific table.
Configure Tables as per Restaurant Layout: #
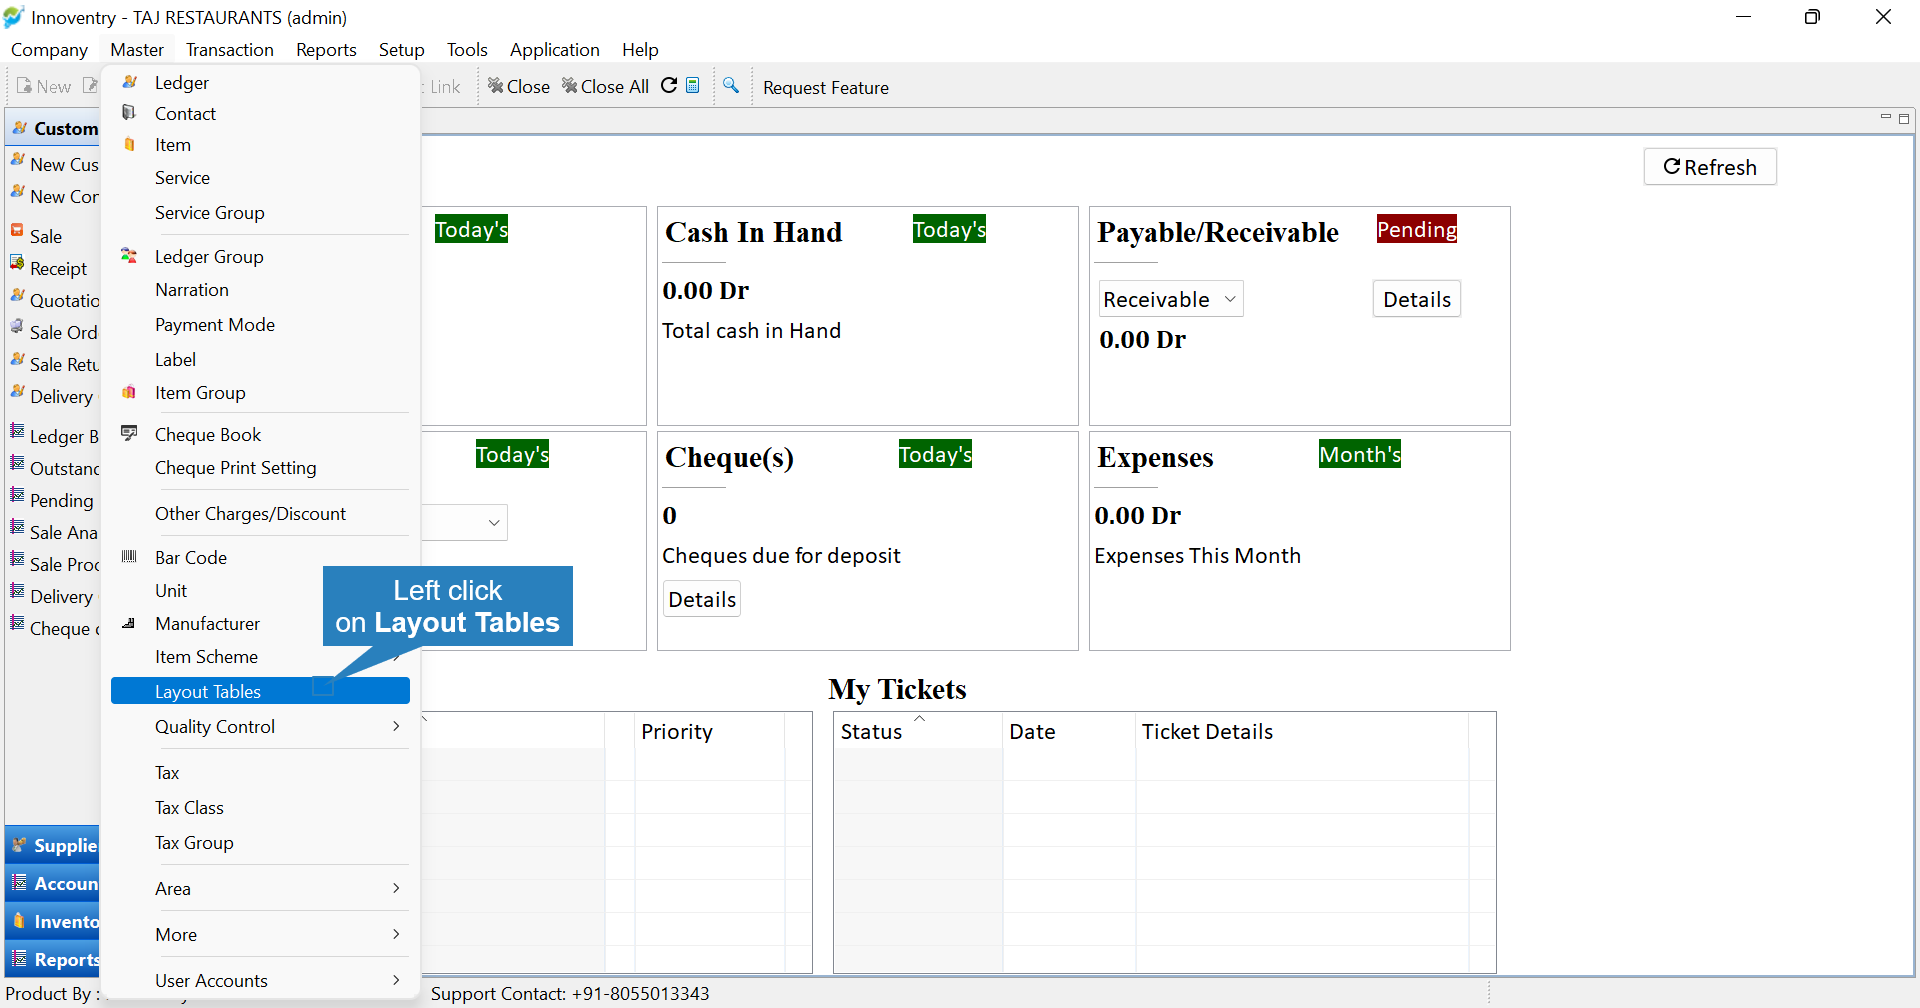
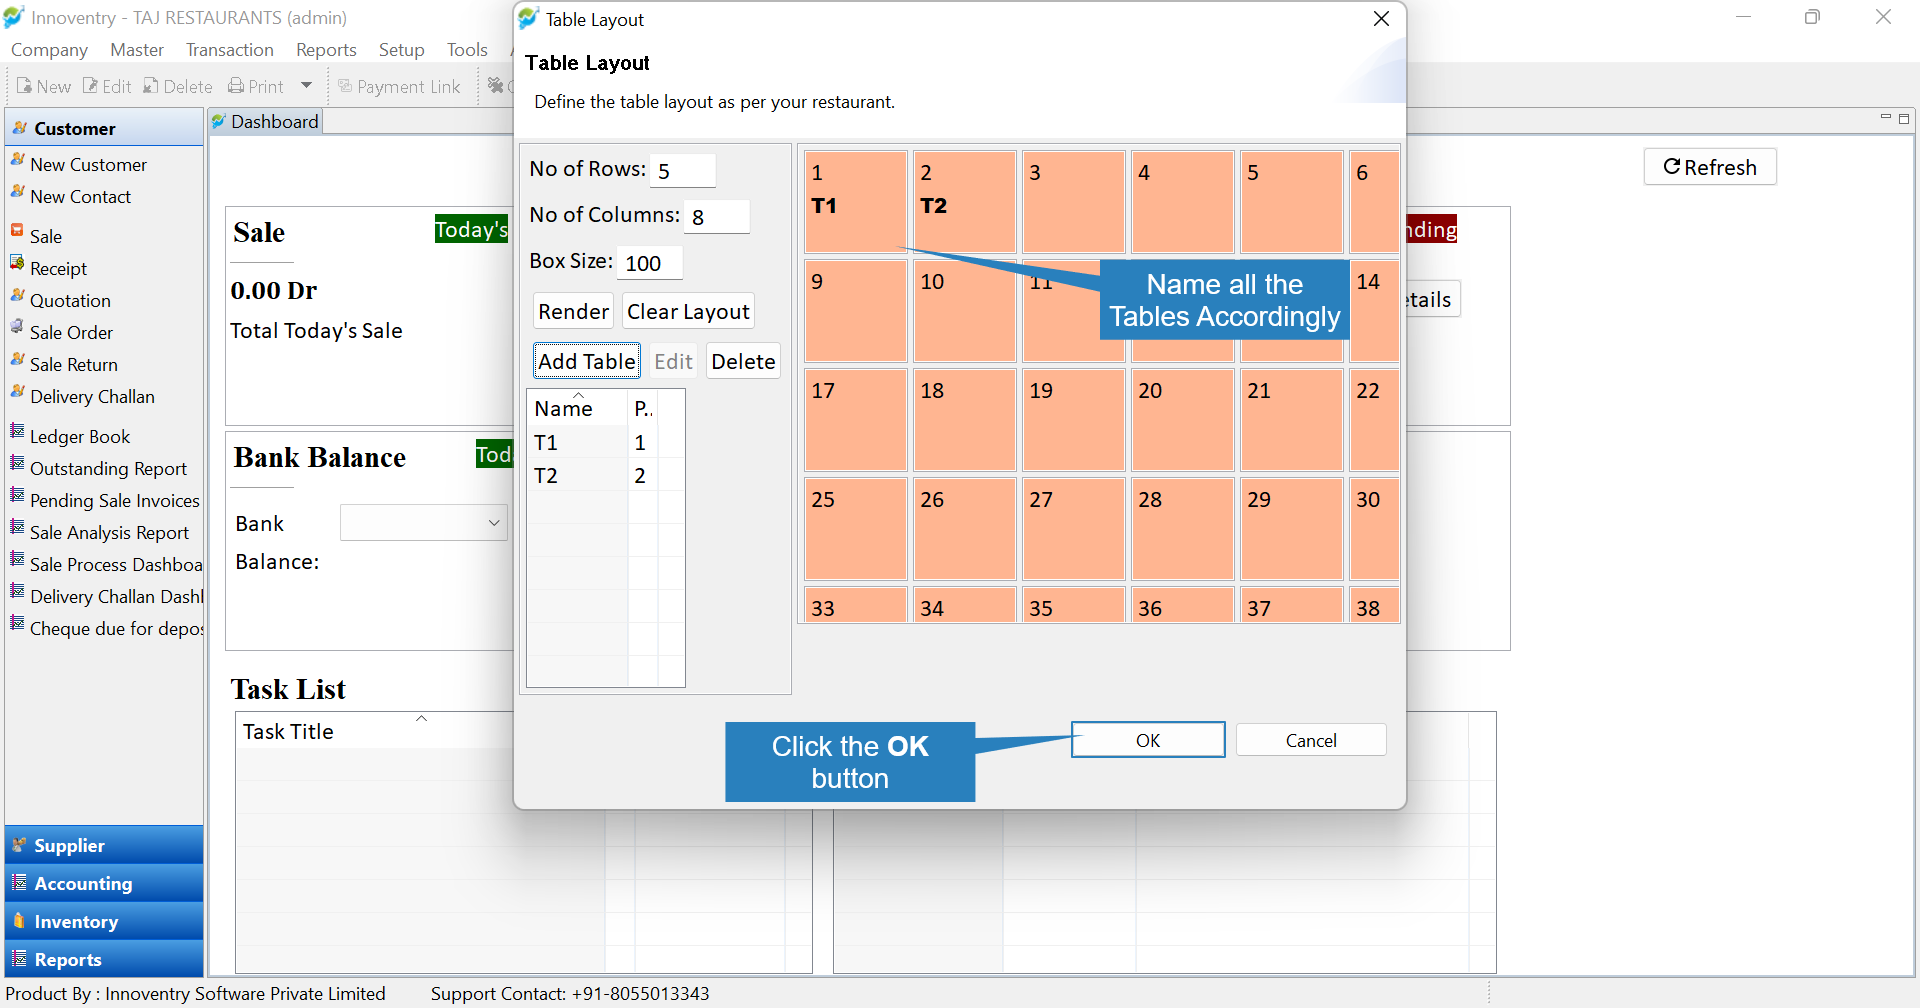
Step 1:Click on the “Master” menu and then select the “Layout Tables” option.
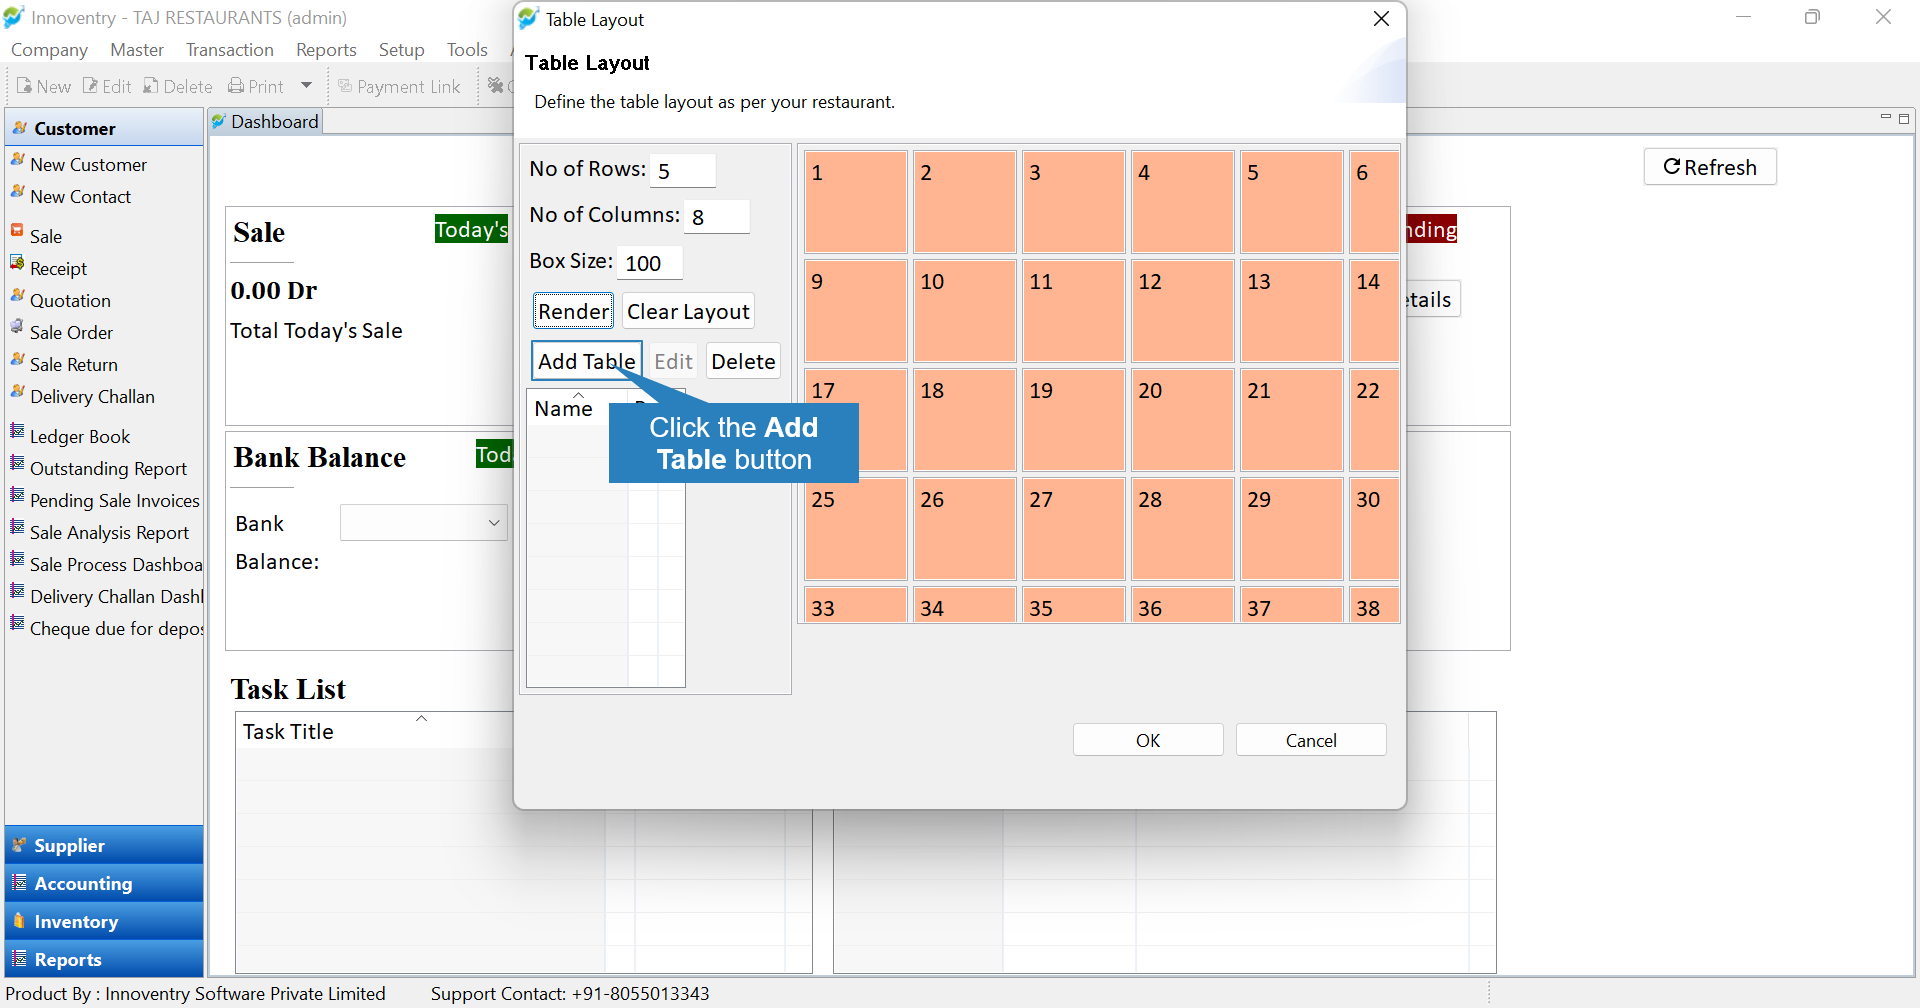
Step 2: Input the number of rows and, columns as per restaurant table orientation and Click on the “Render” option.

Step 3: Name the tables according to your choice: Click on the “Add Table” option.
Insert the name, select position and click on the “OK” button. The tables will be named accordingly.

The user may Delete or Edit the tables after selecting the tables.
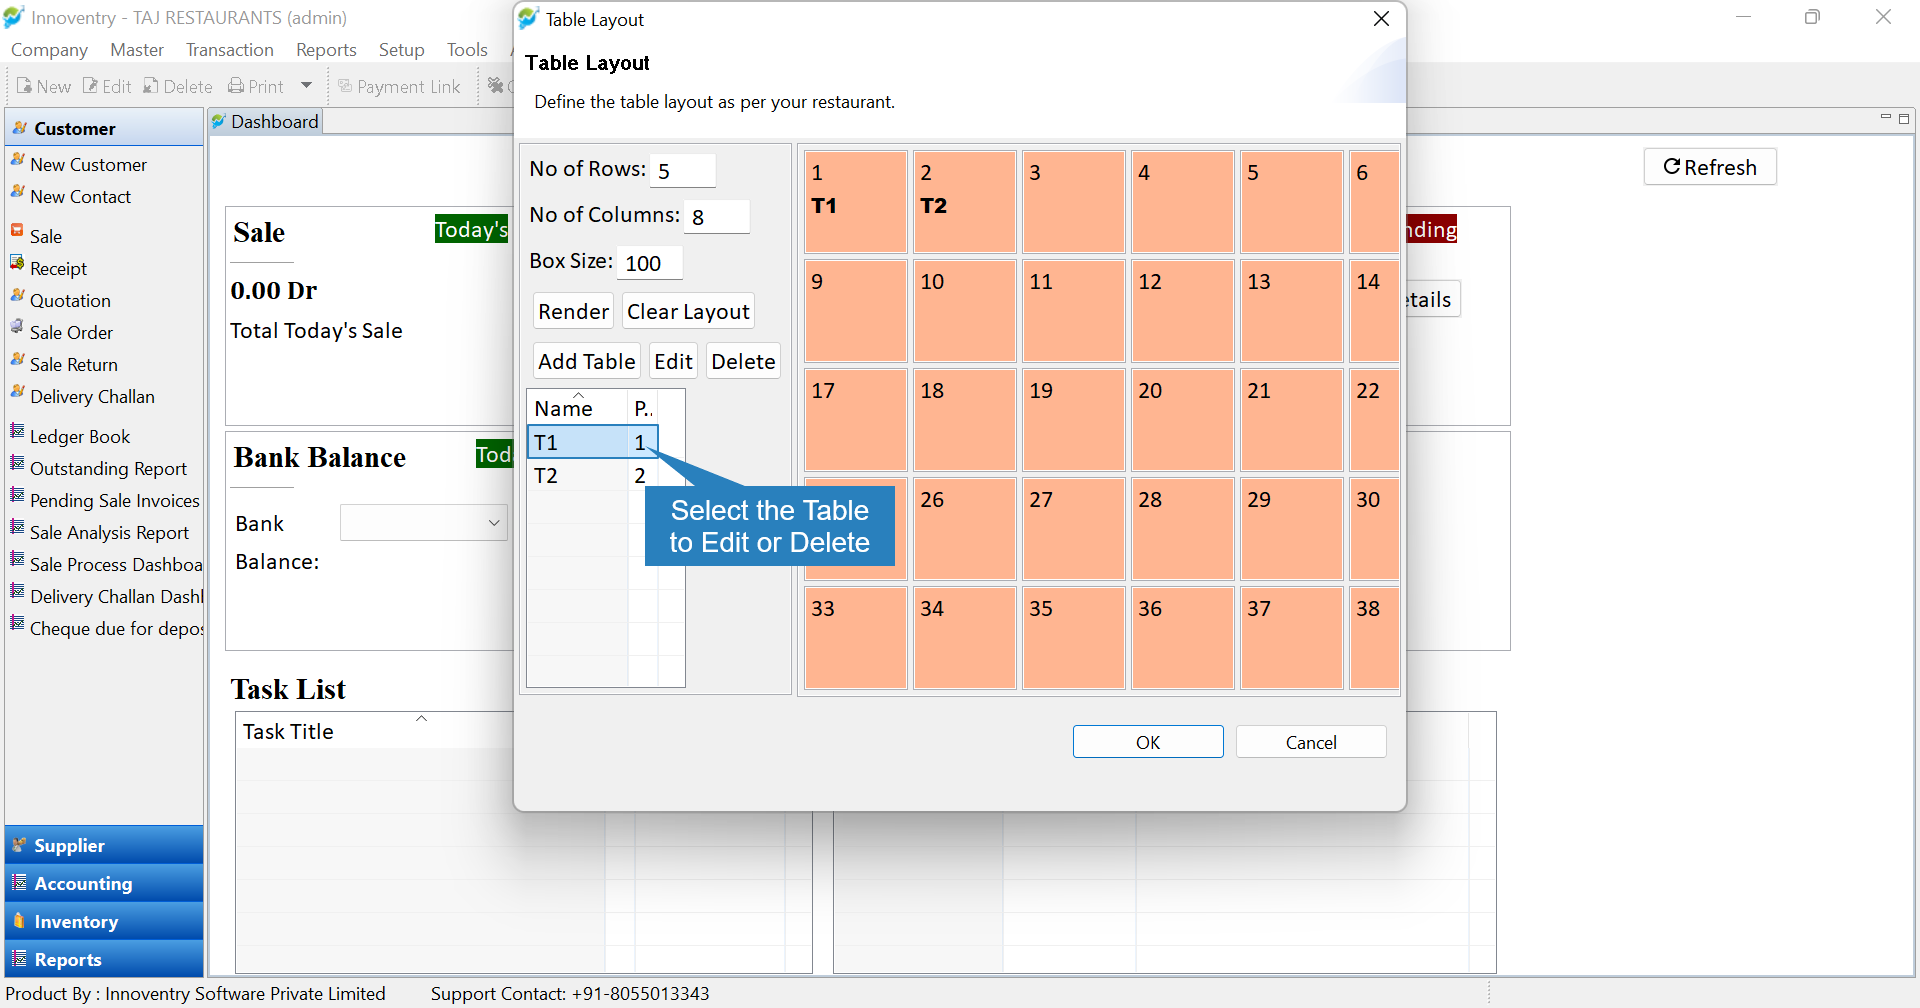
Step 5: After naming all the tables, click on the “OK” button.
Create table wise order: #
In restaurant business, the orders are created usually by the table number. All the items ordered for the tables are finalized and billed accordingly in the end. In Innoventry, the same can be done as follows:
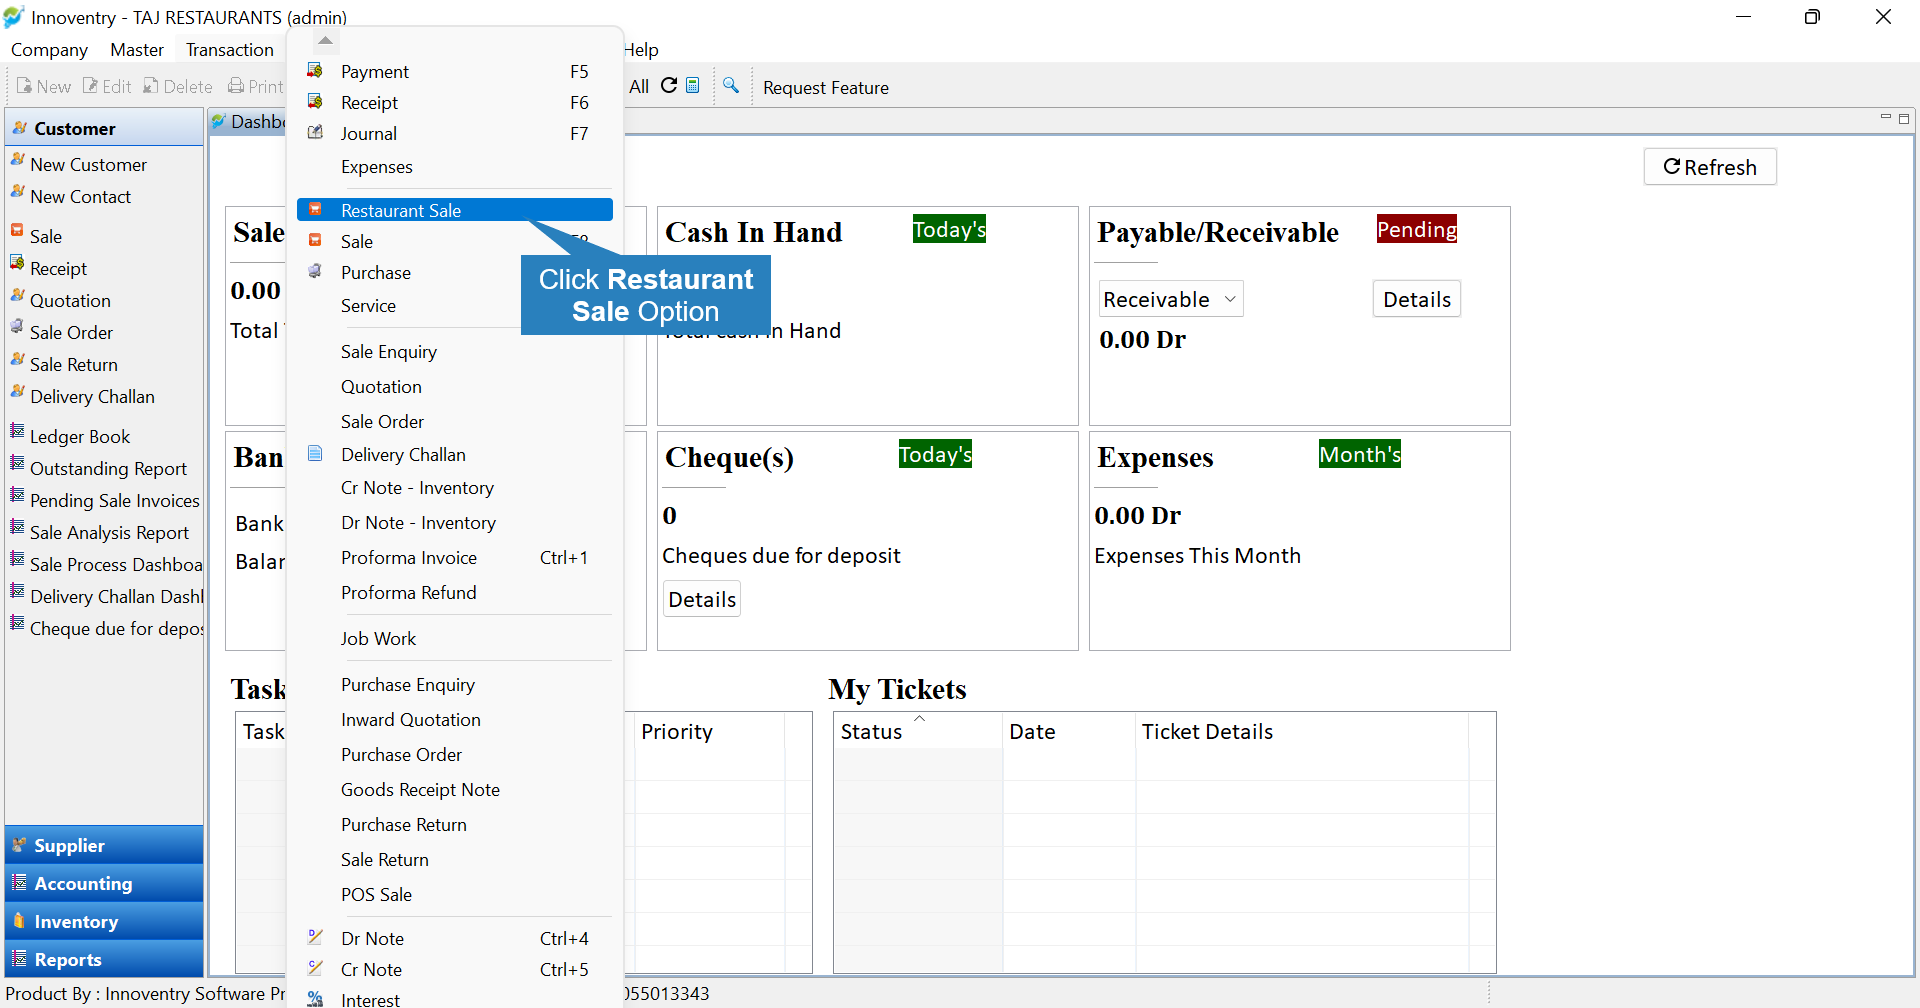
Step 1: Click on the “Transaction” menu and select “Restaurant Sale” option.
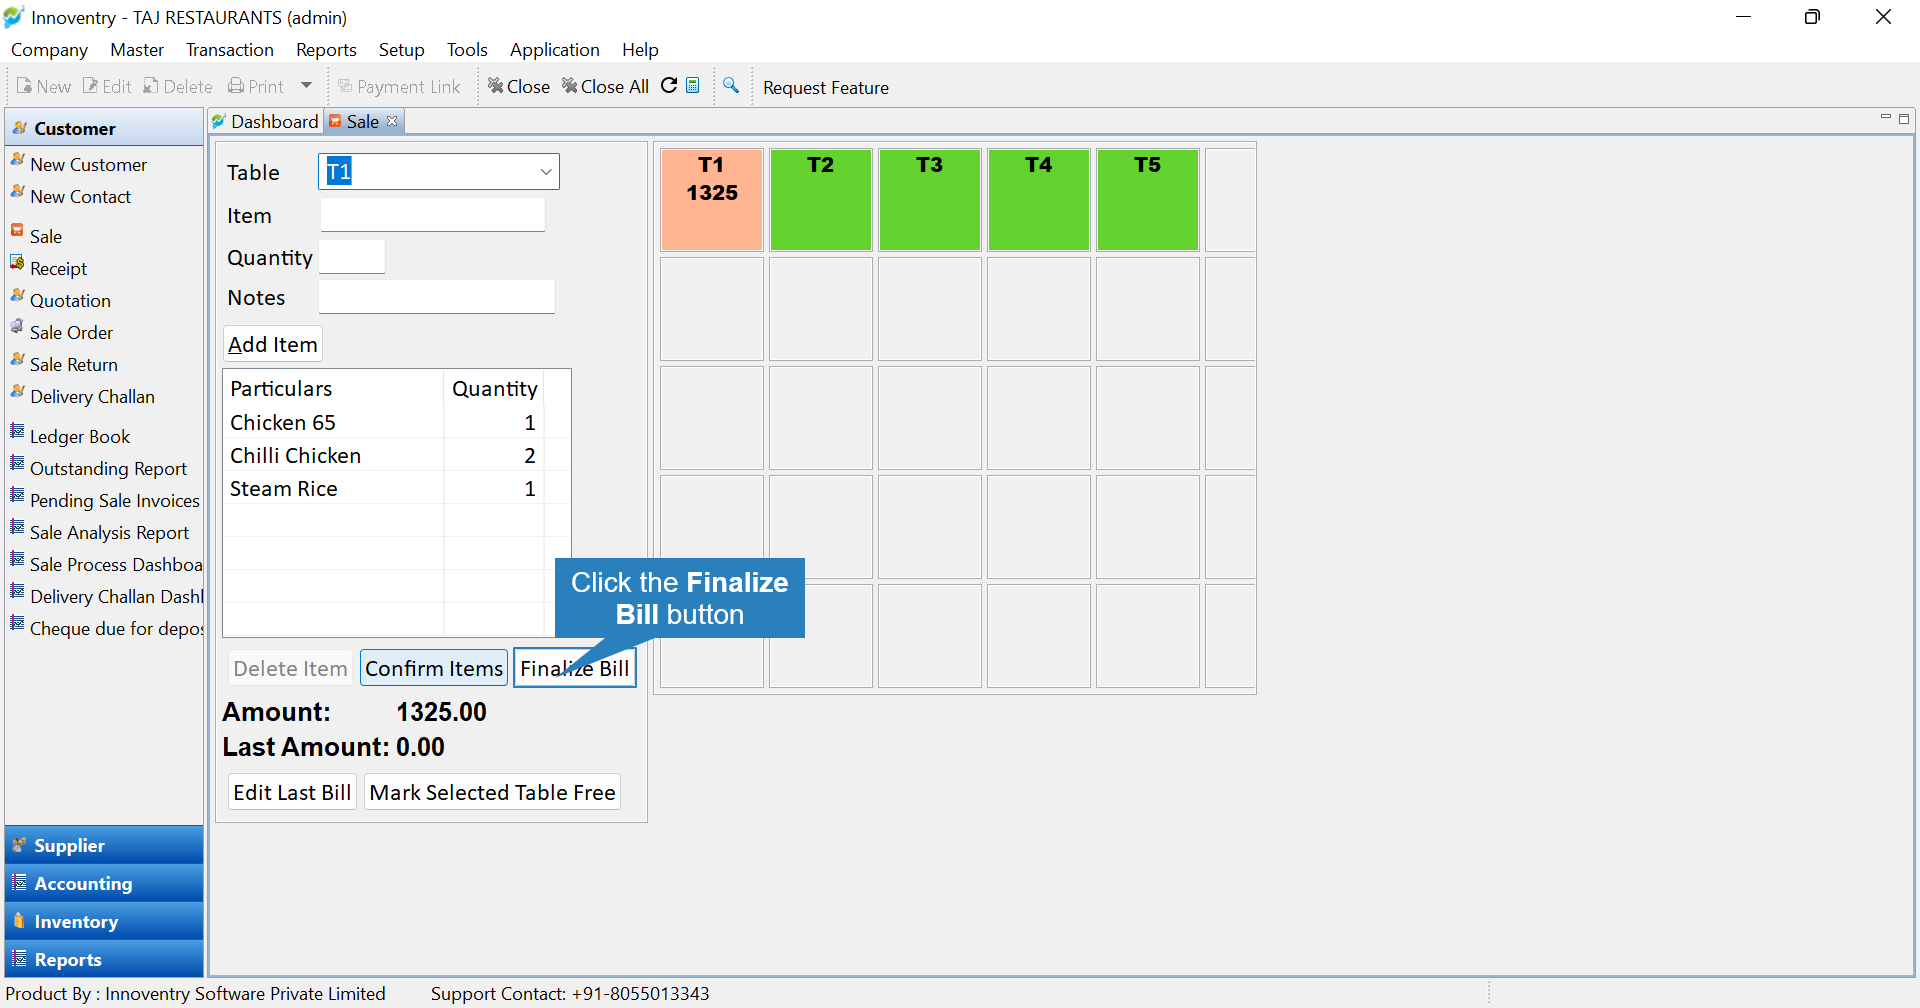
Step 2: Select the table by clicking on it, the table will be highlighted as occupied.
Add items which have been ordered with quantity. Once items are confirmed by the guest, you can confirm the items by clicking on the ‘Confirm Items’ button. Unconfirm items will be visible in blue color.Once the user clicks on the ‘Confirm Items’ option, the items are displayed in black font.
Also, once the button is clicked, the order is printed as the Kitchen Order Ticket (KOT) in the Kitchen as well as at the billing counter if the settings are enabled. Kitchen Order Tickets are sequential in nature, containing details like table number, the order, quantity of each dish, time of order and any specifications regarding the cooking of that particular dish.
Through the KOT, the kitchen and the chefs are automatically informed what is the next dish to be prepared and also from the ‘Notes’ textbox in the below snap we can print any specific requirements (such as if a dish has to be non-spicy or any ingredient the guest is allergic to). This pretty much fast tracks the process. We will understand how to enable the settings in Enable Kitchen Order Ticket section of the article.
The items can also be deleted using the ‘Delete’ button after selecting the item.

Step 3: Once guest is done with his meal & ask for bill , click on the “Finalize Bill” option to open the sale dialog box.
Step 4:
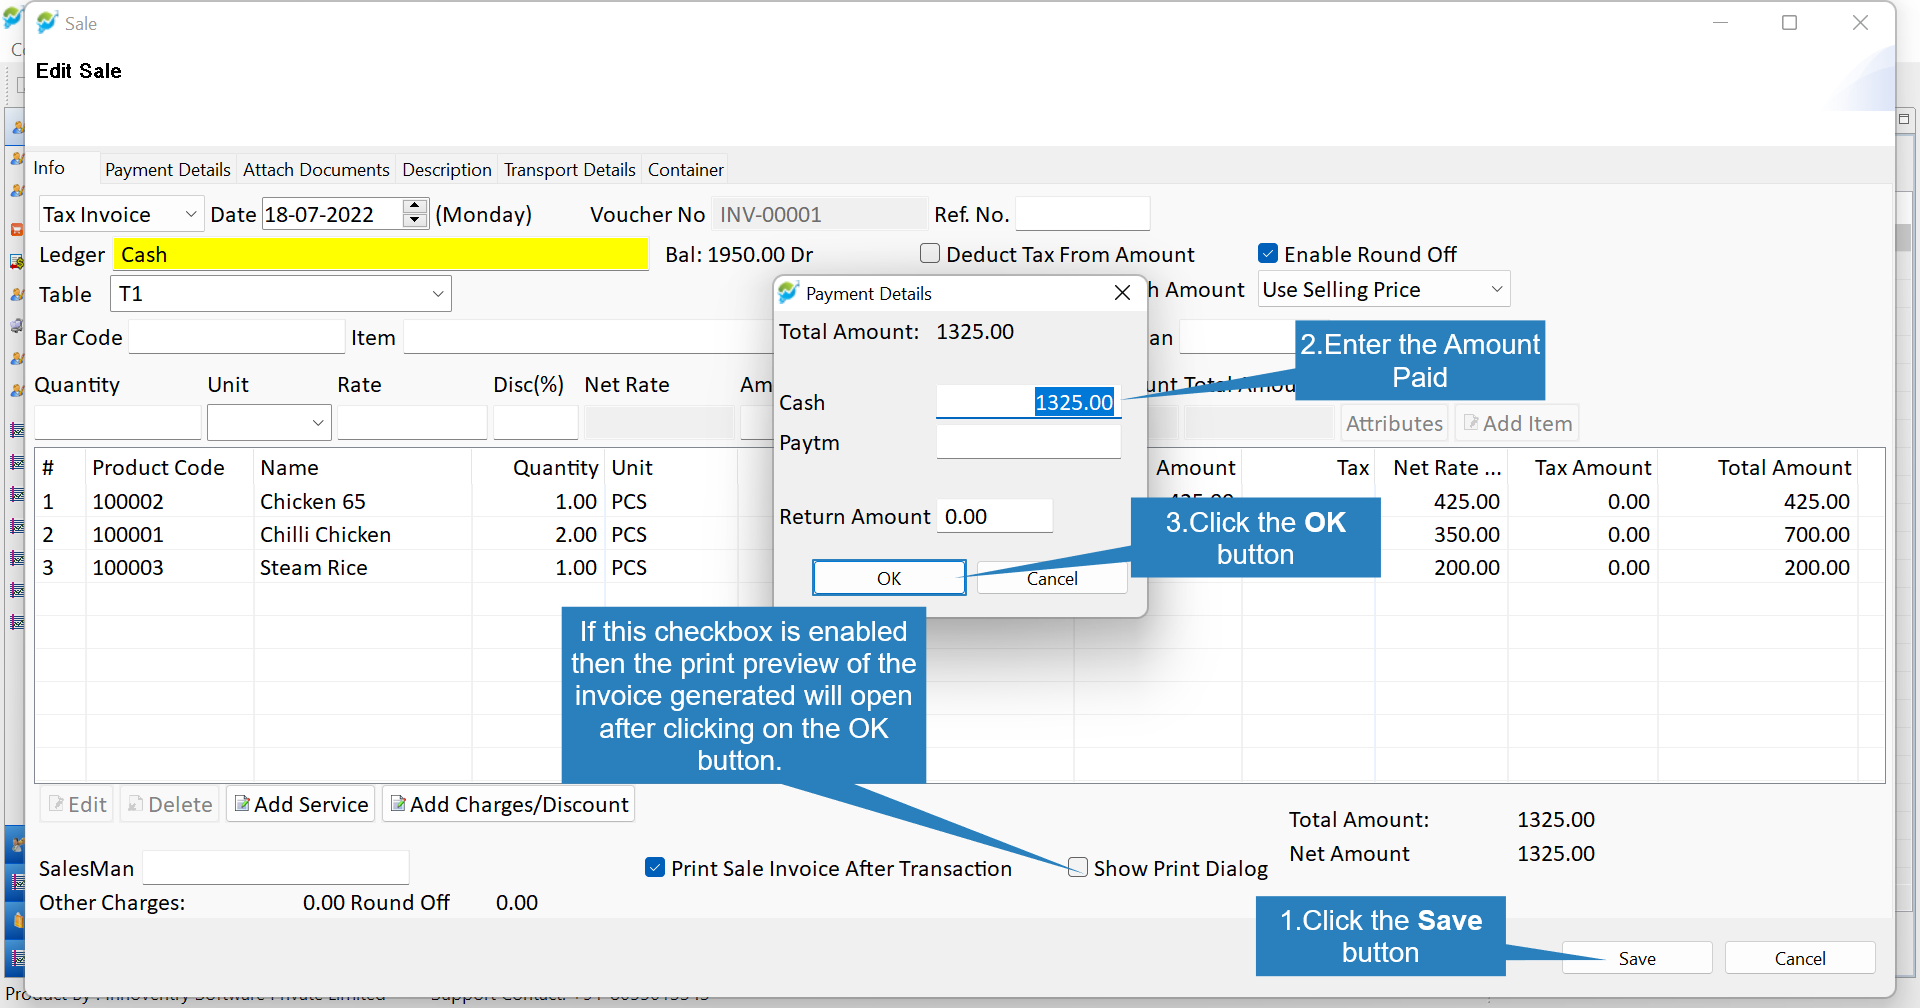
Note that the items, quantity, rate & total amount in the invoice are automatically imported from the Restaurant Sale option making it even simpler for the user. Click on the “Save” option to enter payment details & print invoice.
Over The Counter Sale Mode #
In case of over the counter sale or if order is received online or over the call use the following steps:
Step 1: To create order and invoice for these types of order. Click on the “Sale” option.

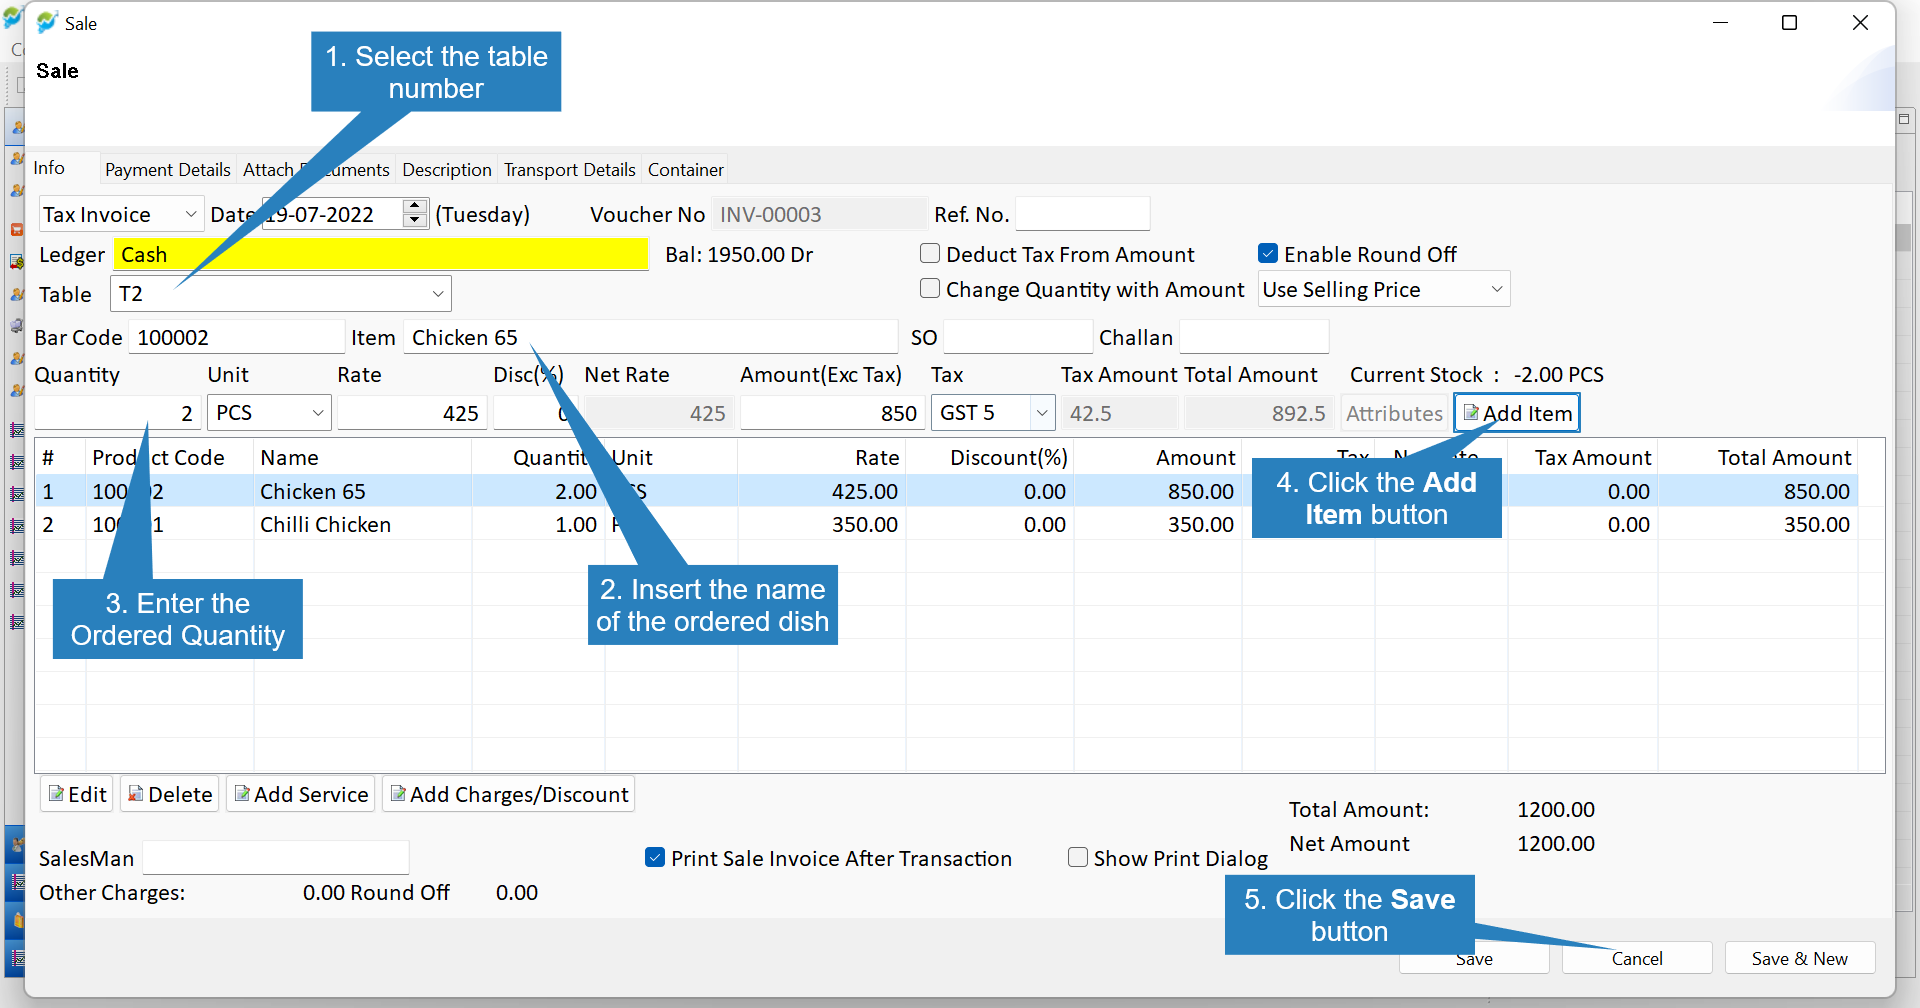
Step 2: Here the bill can be generated after adding the ordered dishes.
>Select the table number from the drop down menu.
>Select the Dish from the drop down list.
> Enter the ordered quantity.
> Click on the ‘Add Item’ option to add the items. Repeat if more items are ordered.
> Click on the ‘Save’ button to Save the invoice.
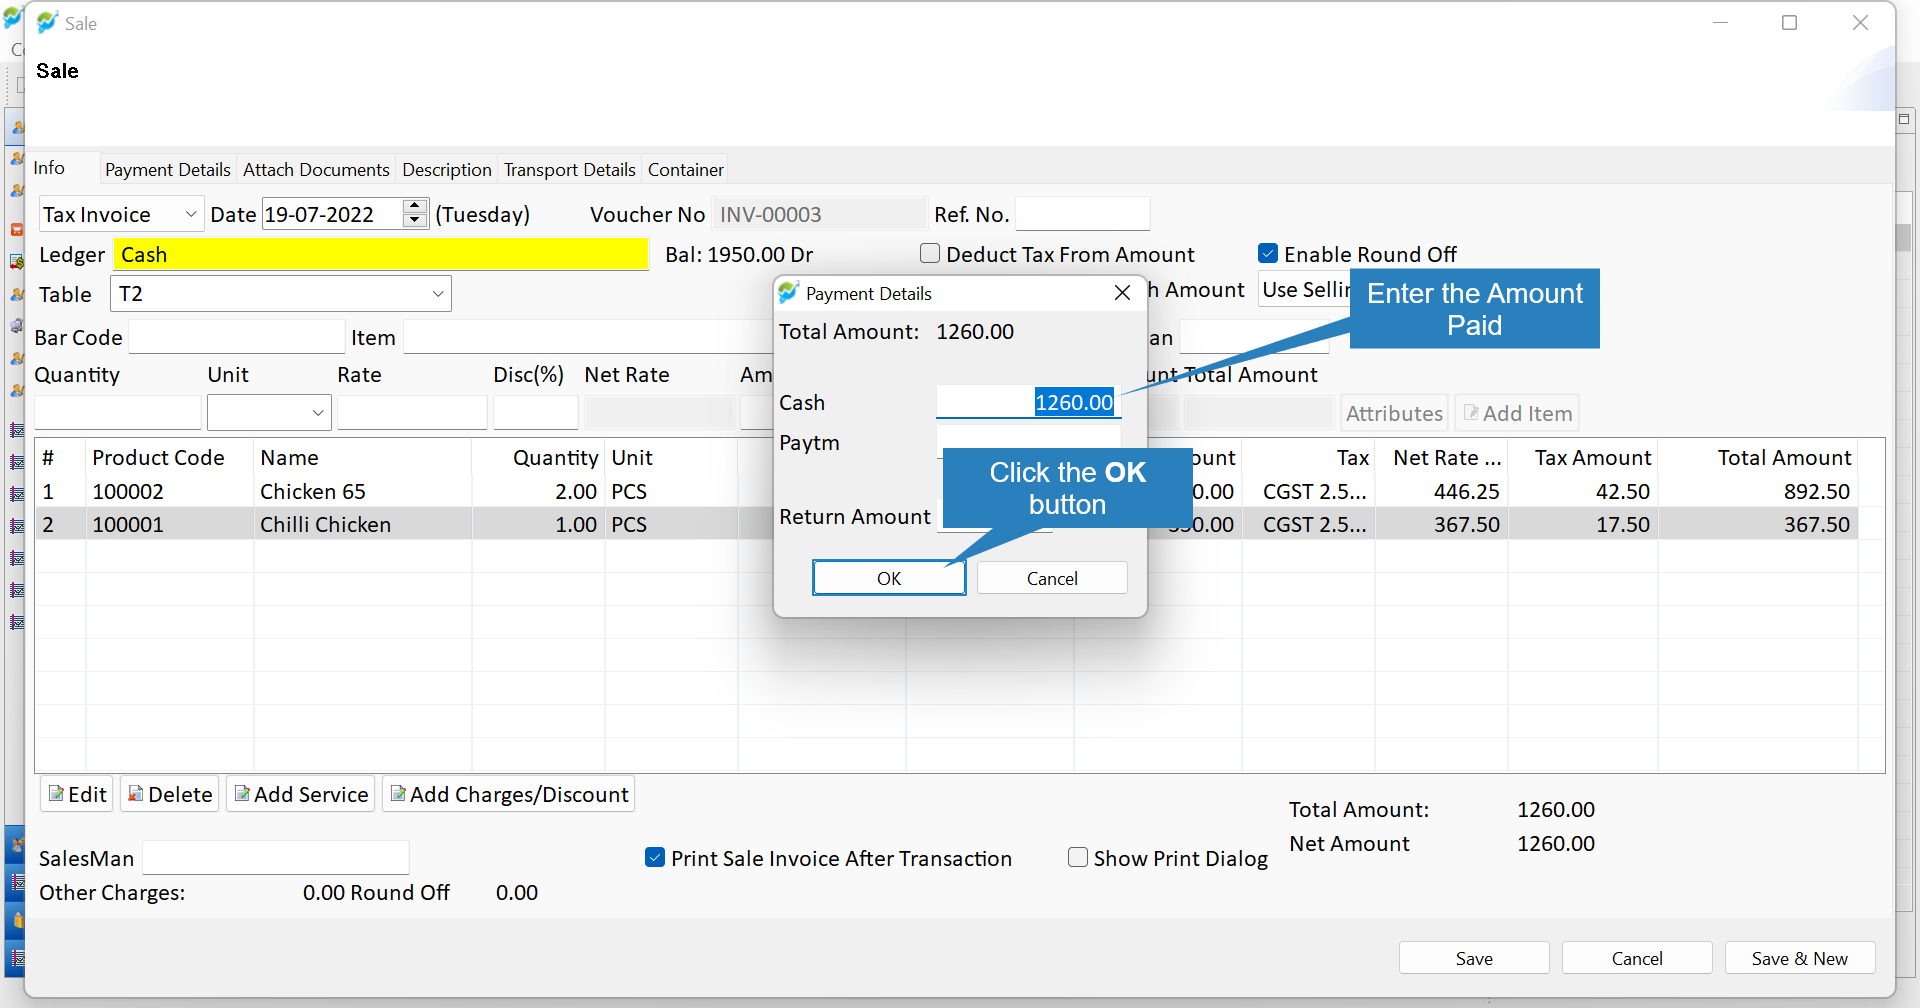
Step 3: Enter the amount paid. Click on the ‘OK’ button to complete the transaction and then the print preview of the bill will be generated which can be printed.
Enabling Kitchen Order Ticket Printing and Counter Ticket Printing Simultaneously: #
Another very important feature which we have included in the software is that we can print the order bill on the counter printer as well as in the kitchen i.e. kitchen order ticket. To enable this setting:
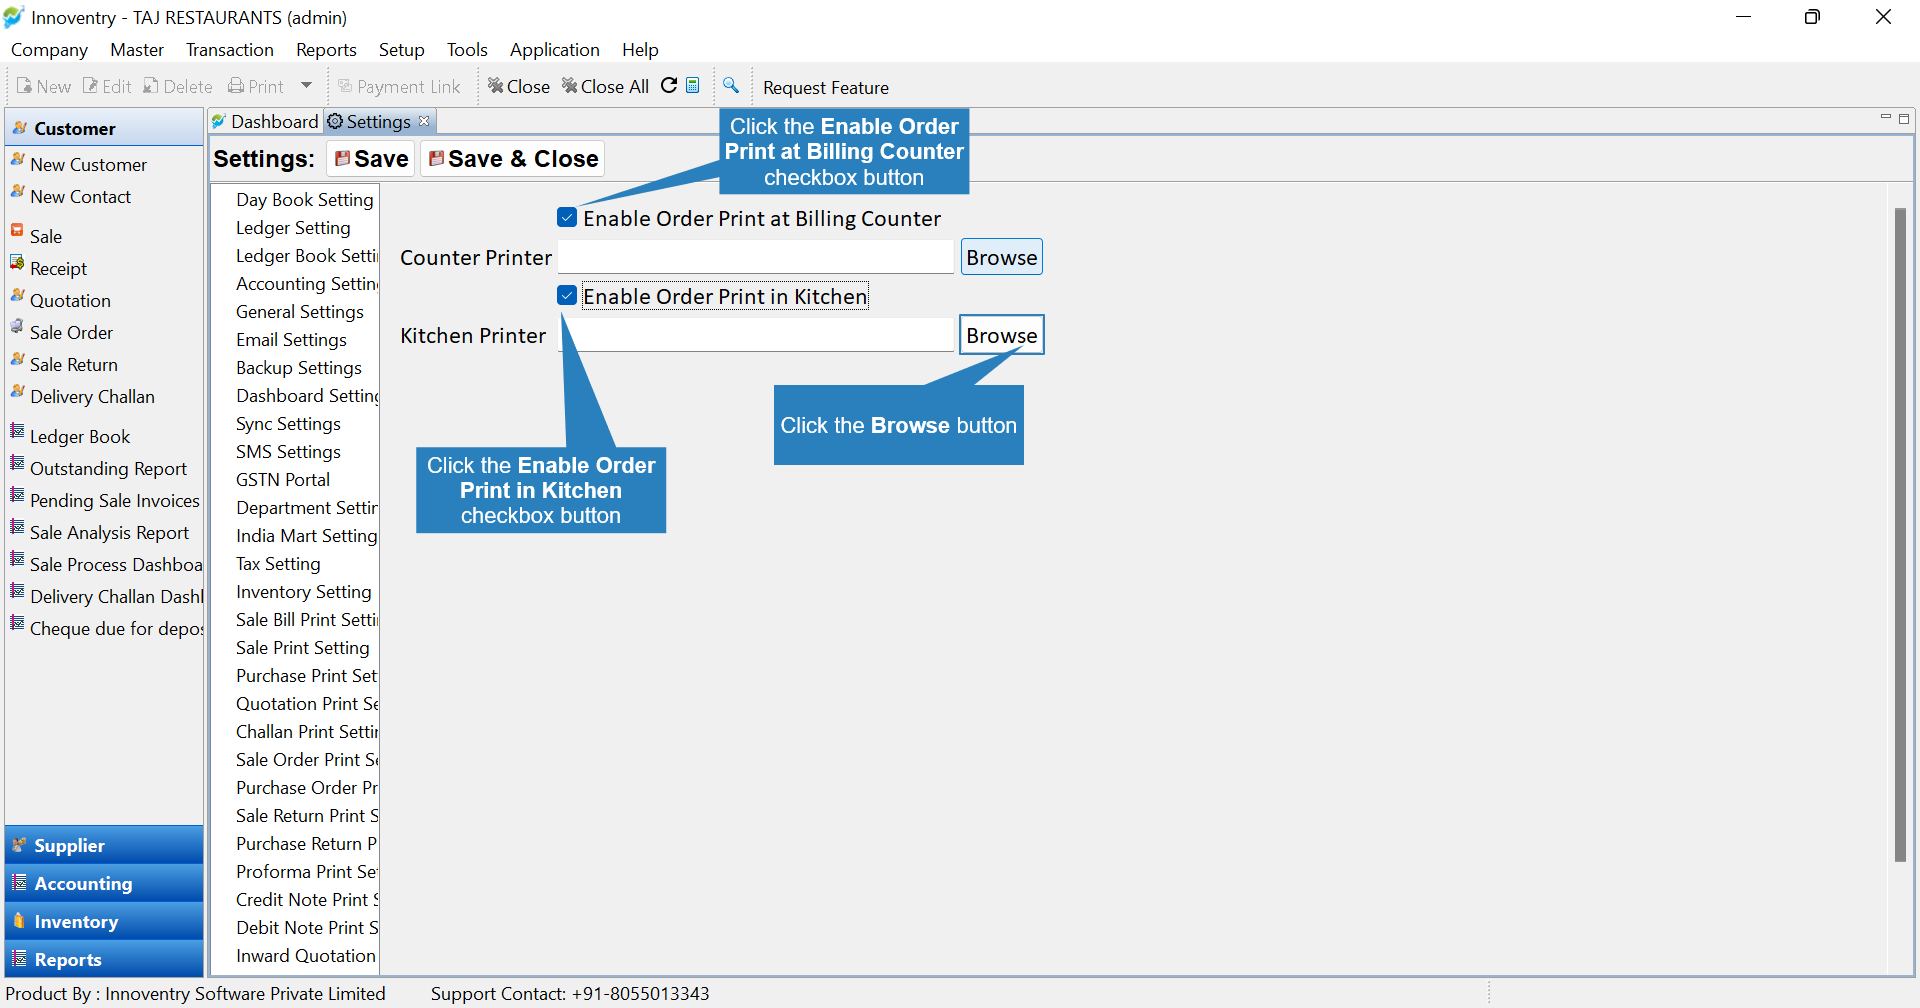
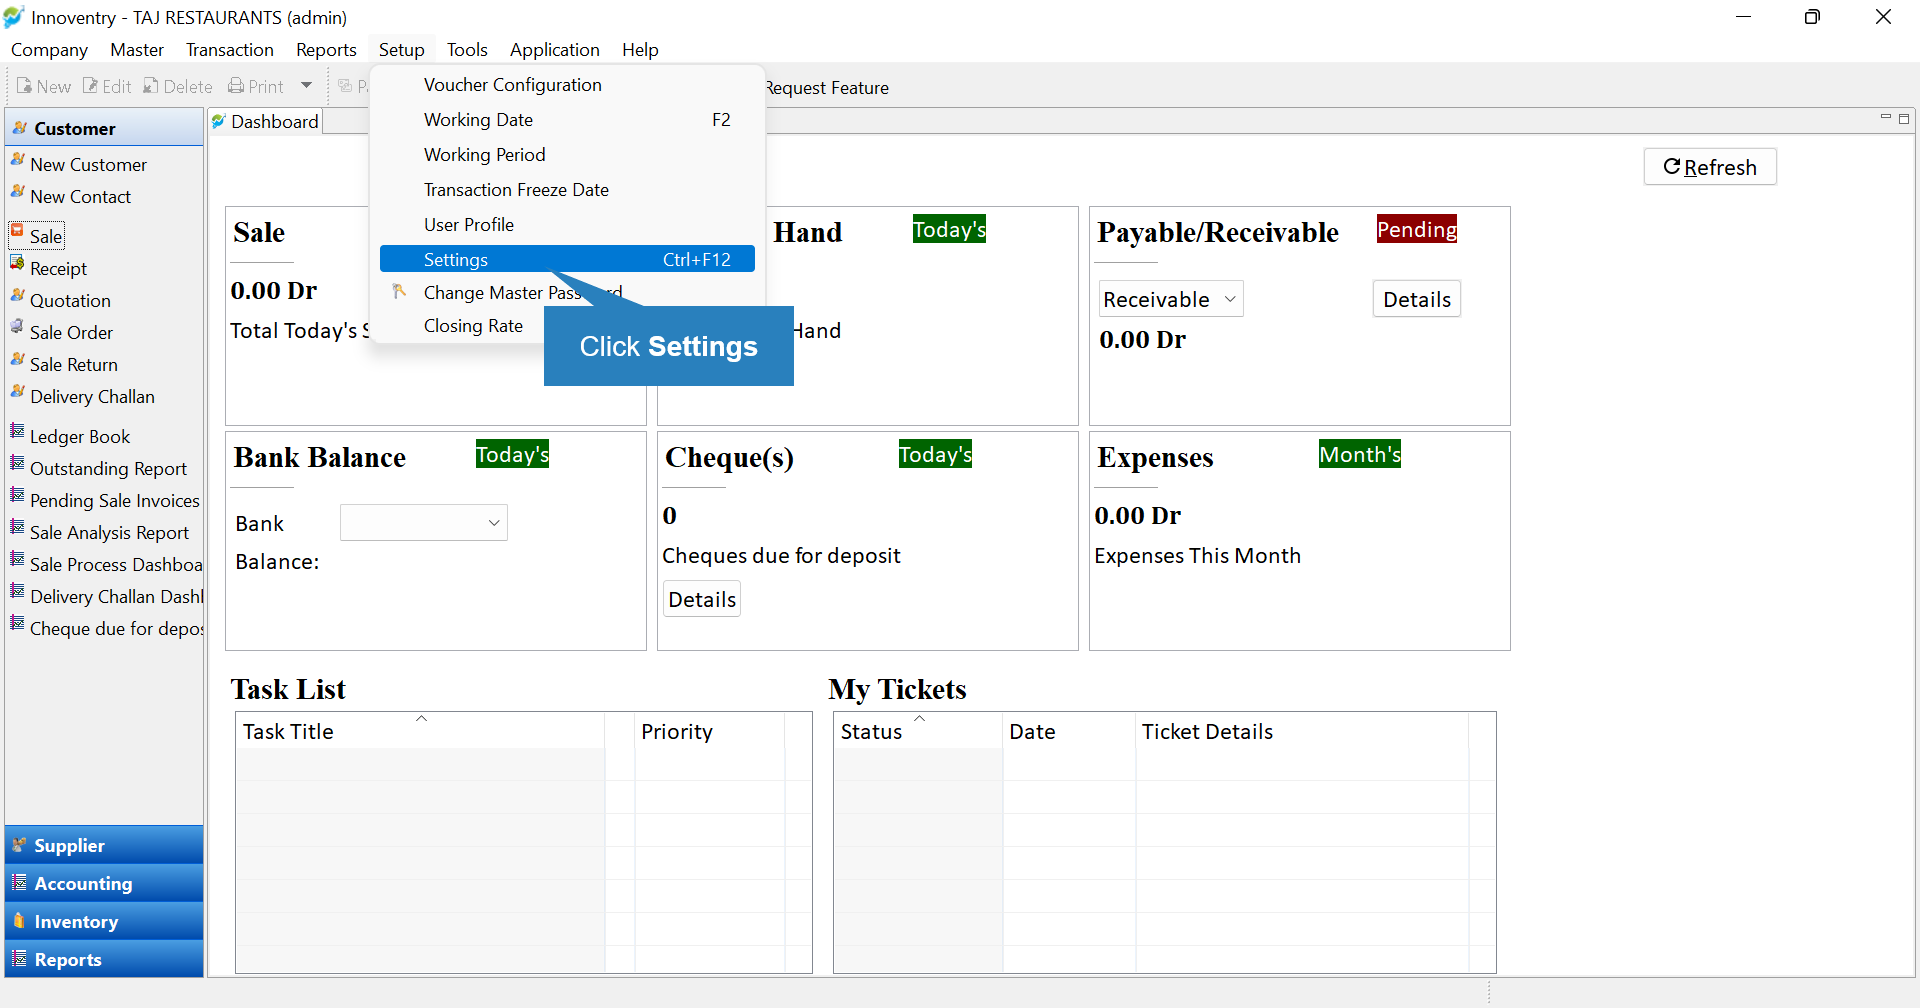
Step 1: Go to the “Setup” menu and then select “Settings“.
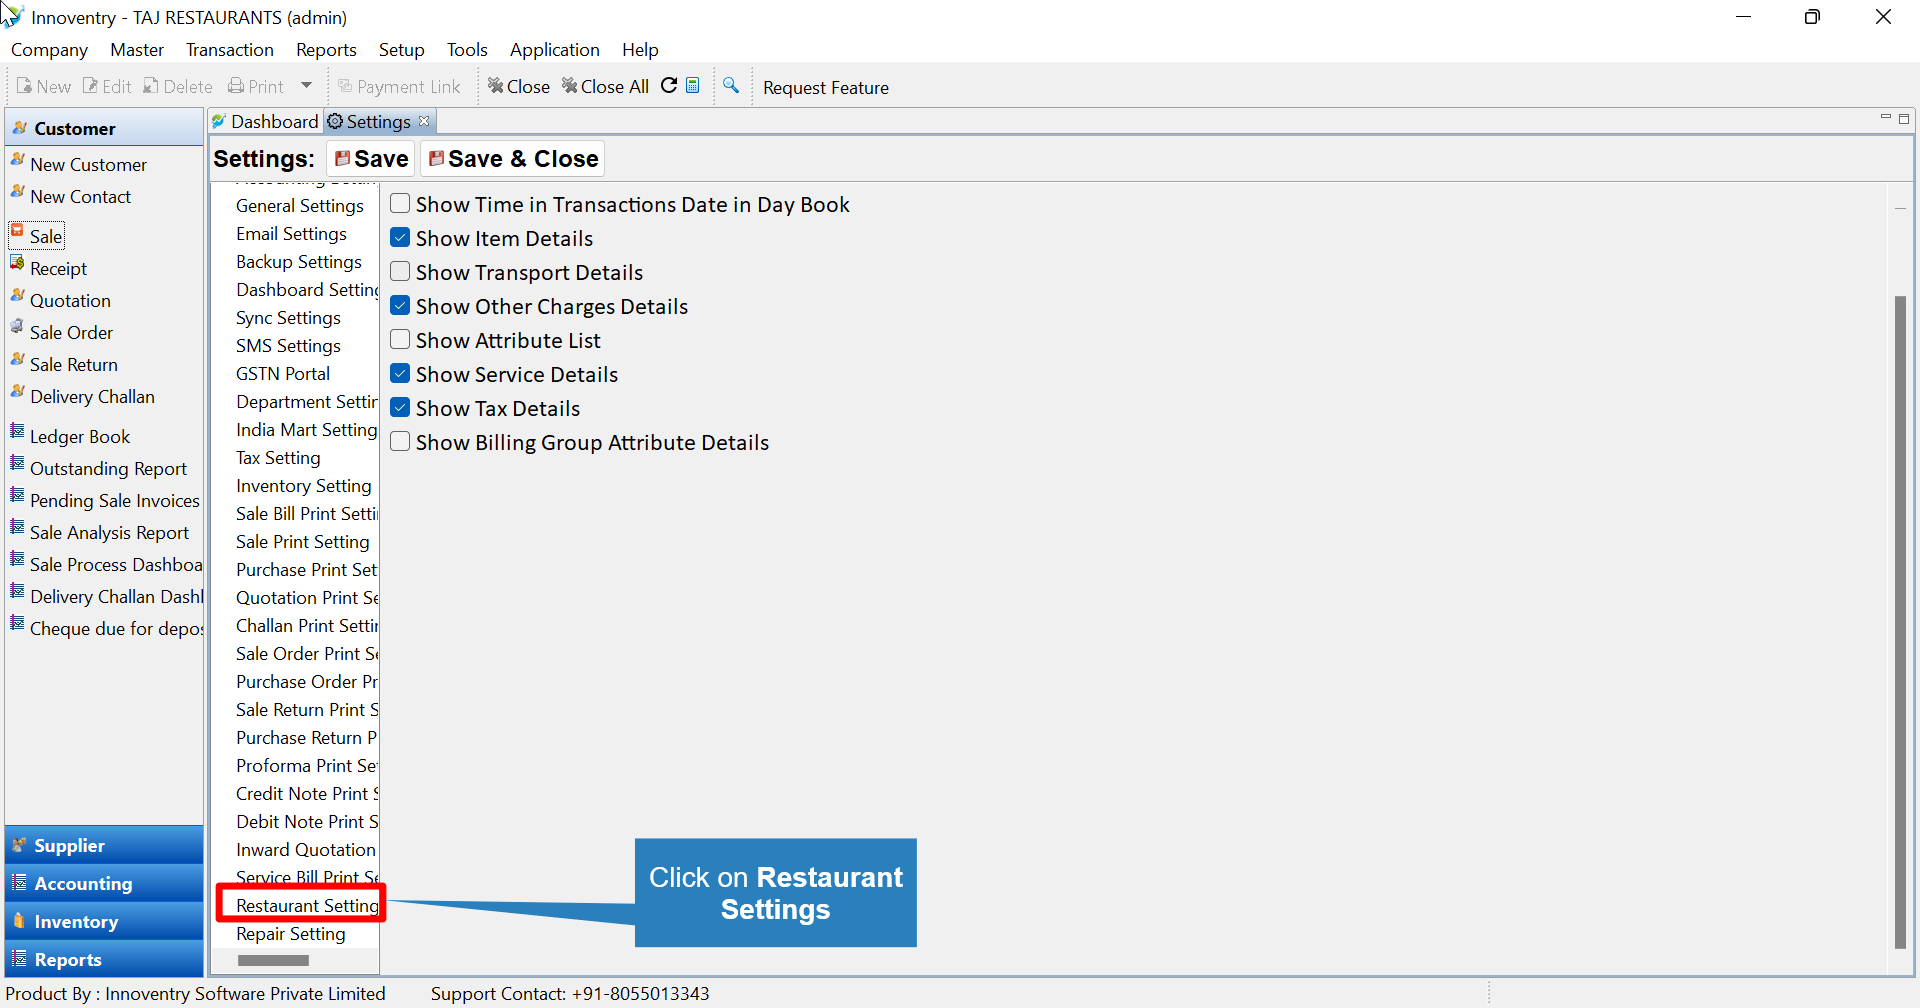
Step 2: Scroll down and click on the “Restaurant Settings“.
Step 3: Click on the following checkboxes as shown in the image below to enable printing on the kitchen as well as the counter printer. The user can select the printer using the browse button as shown. Finally, click on the “Save & Close” option to save and close the settings.
Now, as explained earlier once in the Restaurant sale option the user clicks on the ‘Confirm Items’ button. The confirmed items will be printed in the Kitchen Printer as KOT.