A service ticket is a potential business query, complaint or support requested by the customer to a business. An efficient and simple to use online ticketing system as provided by “Innoventory” streamlines how you communicate with your customers. Unlike email, it does not require the set up of multiple folder structures and color coded tags to prioritize and track relevant customer queries. It brings in customer conversations from multiple channels like phone, email, and social media into a single, easily accessible location where you get the entire context you need. It should have the efficiency such that even if we want to refer the conversation in the past between client and business we should be able to refer read and understand.
Why managing tickets are important?
- Master multi-channel communication:-Since service tickets can be generated by multiple platforms such as desktops,mobiles etc. which creates wider chances of receiving service requests,potential business deals for the business.
- Increase efficiency: – Service tickets are very quick and easy to raise. From assigning tickets to a particular agent, to creating preset responses for frequently asked questions, to defining escalation rules if deadlines aren’t met, a helpdesk makes it all easy.
- Track and measure your support– With a good ticket management software, you can monitor your team’s progress seamlessly.Using comprehensive reports, you can identify problems faster, recognize good or bad performance, track customer satisfaction and monitor service standards.
- Extend your helpdesk’s capabilities– It is important for a help desk ticketing system to be integrated with solutions like CRMs, email marketing tools and/or team collaboration software. This will ensure agents can access important contextual information about customers right inside the helpdesk.
- Increase customer loyalty– With a well- organised customer support process, the courtesy of an online ticketing system, it becomes easier to make customers happy. These customers will be loyal to your brand, and will spread the word about their positive experiences.
How to configure service ticket meta information?
Fields can be added to the ticket information feeding windows as follows:-
Step 1: Open the innoventry software and log in with user id, password and company id. Following which the following screen appears.
Step 2: Then the following screen will appear. Click on “Master” –> More –>Tracker as shown.

Step 3: Then select and click “Service call” from the five options as shown in the snap below.

Step 4:- Following screen appears with four options.Here we can add following:-
Description:-
- Open status value- The stages in which wewant to discuss the deal with sales lead or as per our business workflow can beadded or deleted accordingly.
- Close Status Values- Close status valuescan be updated accordingly.
- Custom Fields- If we want to add custom field to our enquiry tab we can choose from the set of pre defined attributes from the drop down menu or we can define our own attribute and add.
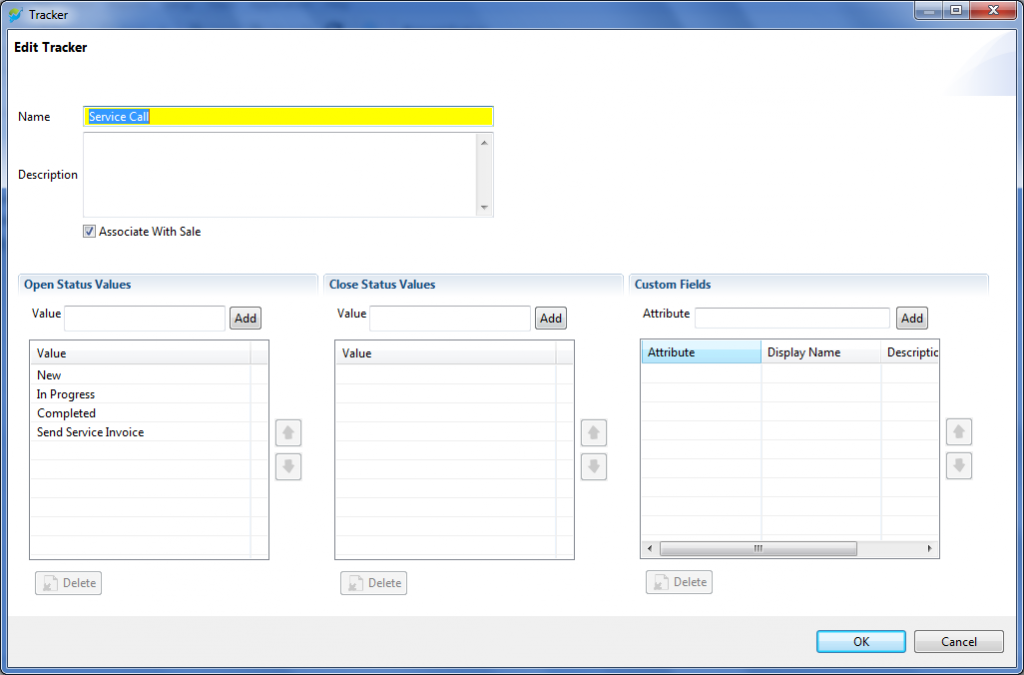
Step 5:-Make required additions and click “OK” tab.
Add new service ticket from desktop:-
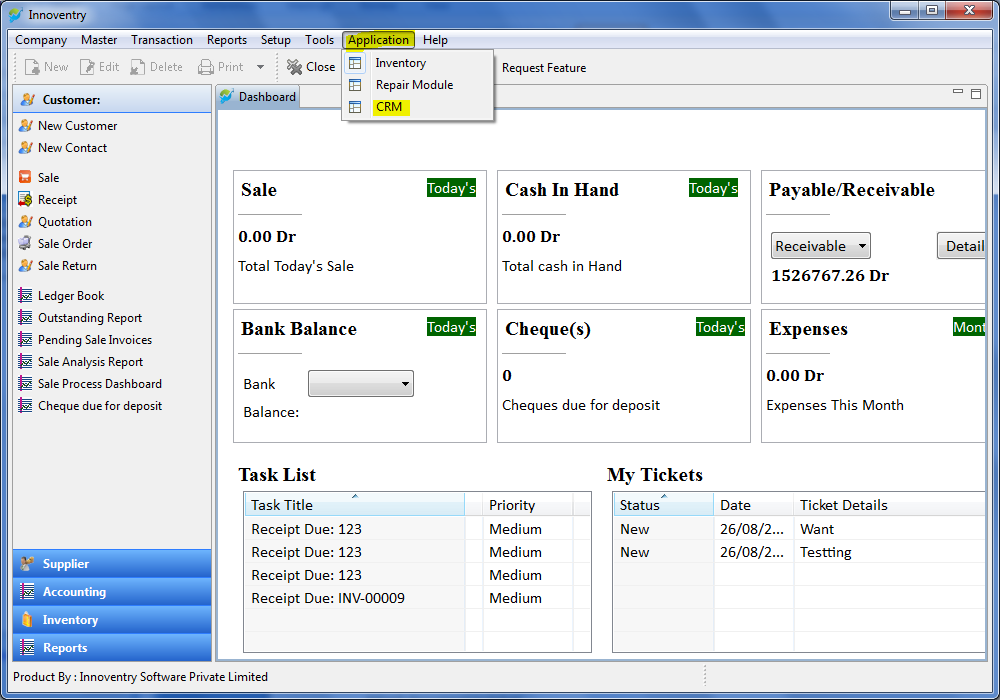
Step1: Open the innoventry software and log in with user id, password and company id. Following which the following screen appears.

Step2: Click on the tab “Application” (highlighted with yellow in above snap) and then select the “CRM” option as shown following which the following screen will appear.

Step3: Click on the tab “Transaction” followed by “Service Call”, then the following screen will appear:

Step 4:- Here we can add the information accordingly and then finally the screen will look something like this:-
- We can add name in contact text bar by selecting saved contacts from the drop down menu or clicking on “New Contact” from the drop down menu and filling data of new contact accordingly.

- We can select the status of the ticket using the drop down menu as shown in the snap below, (we can add or delete the status we require according to our needs- refer to help section for details).
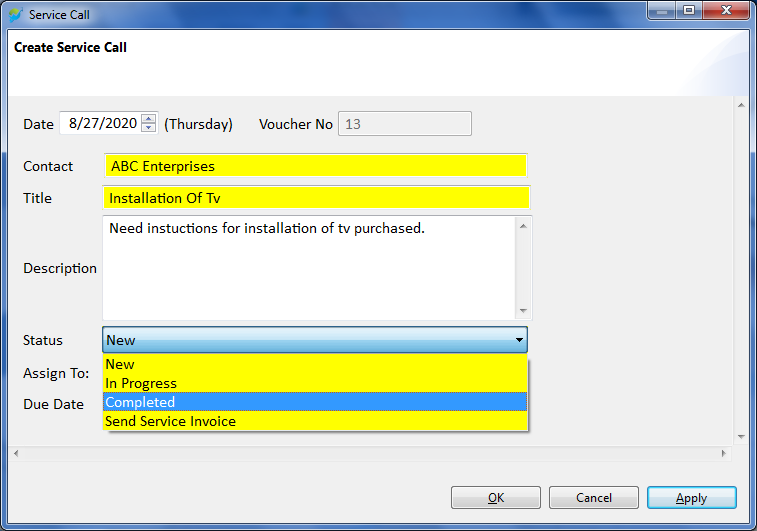
- Then we can assign the service ticket to a salesperson by selecting a drop down menu.

- Finally we can feed Due date according to our convenience so that the final screen looks something like this.

Step 5:- Finally click “Apply” button and the service ticket is added to the software with unique voucher number which can be used for future reference.
Add new ticket from mobile app
1) By Customer (Service Desk App):-
To download Service Desk App App Click Here.
Step 1:- Download the Innoventry service Desk Customer App from Play Store or App Store.
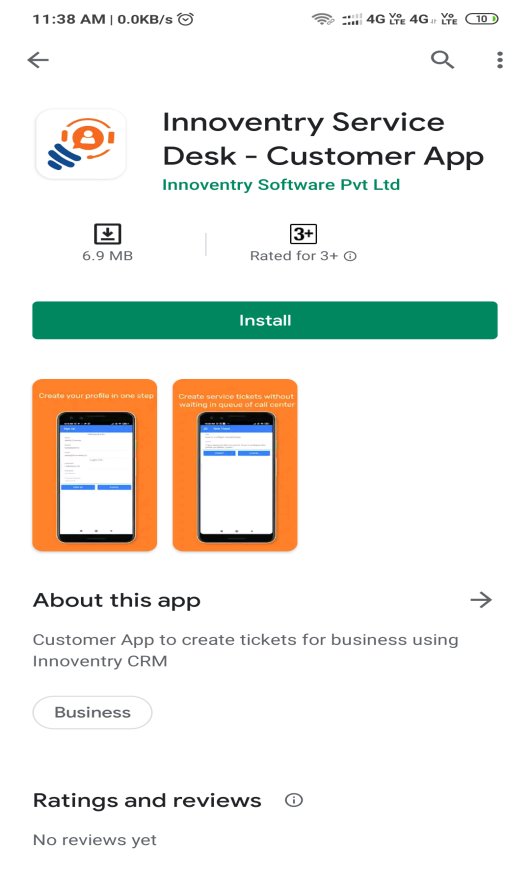
Step 2:- Login using User ID, Password and Company ID or create new credentials from the options available in below snap.

Step 3:- Following screen will appear:-

Step 4:- Click the”plus” sign in the bottom right hand corner of the screen.
Step 5:-The following screen will appear. Add the “Title” and “Details” of the service ticket according to the service required as shown:-

Step 6:-Press the “Submit” tab and hence the Service Ticket is created.
2) By Staff ( iCRM App ):-
To download iCRM App Click Here.
Step 1:-Open the innoventry CRM app in your mobile and log in using UserID, Password and Company ID. Following which below given screen will appear.
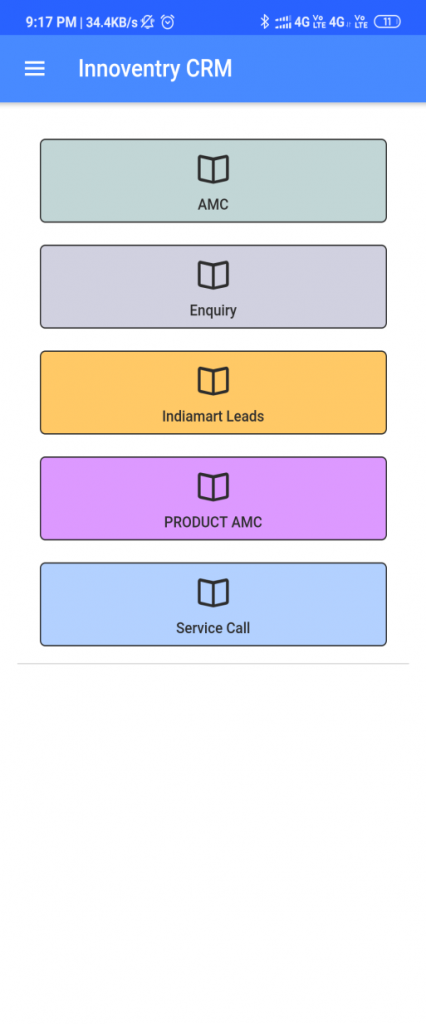
Step 2:- Now click on the option “Service Call”. Following screen will appear:-

Step 3:- Click the “plus” sign in the bottom right hand corner of the screen.
Step 4:- Following screen will appear. Add required data, select status and assigned person through the drop down menu.


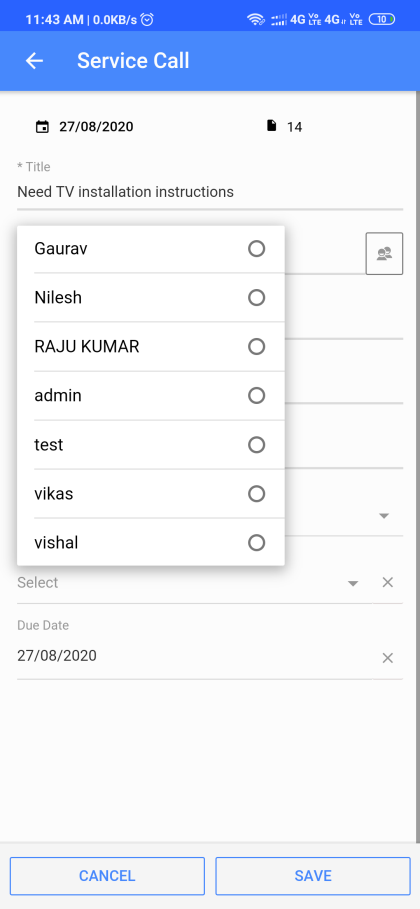
Step 5:- Click “Save” tab and the Service Ticket is added to the assigned person.
Ticket Status Update and Dashboard:-
During the process of dealing with Service Tickets in a business, it is required to update status of the ticket at different stages. Innoventry has features to allow that and it can be performed by following steps given below:-
Step 1: Open the innoventry software and log in with user id, password and company id. Following which the following screen appears.

Step 2:-Following screen appears. Click on Reports—>ServiceCall Board.

Step 3:- Follow points a, b, c:-
a) Select the assigned salesperson
b) Click “Show”

Step 4:- Following screen appears. In this screen follow ‘a’ and ‘b’:-
a) Select the enquiry
b) Click on “Update” tab

Step 5:- Following Screen will appear.
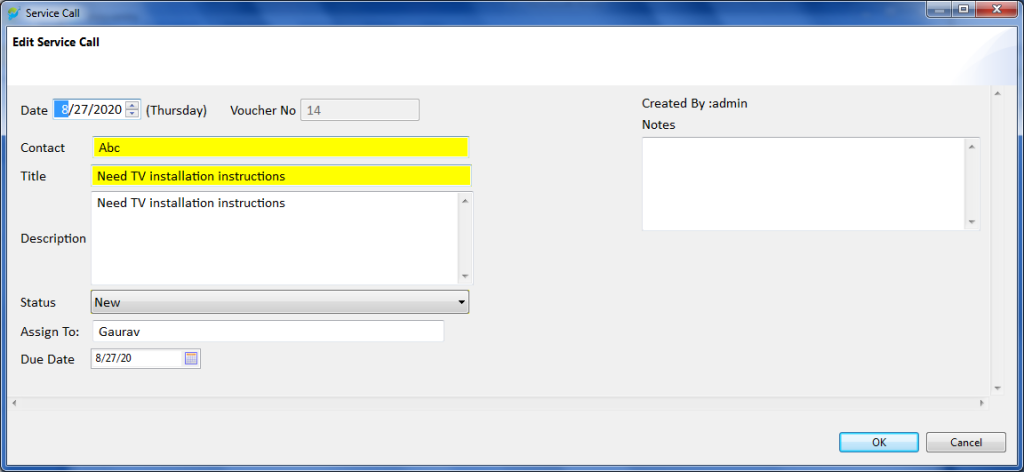
- We can update the Status, Due Date, and Assigned Salesperson of the service ticket using this pop up screen.
- We can also add Notes in the Notes text box as shown in the above snap which will be saved in the service ticket automatically and can be referred in future too.
Step 5:- Press OK tab to save changes.
Step 6:-The service ticket will then be shifted to the new status. For example, the service ticket status updated to “In Progress”. The screen will appear as follows:-


