- What is tracker?
In “Innoventory”, tracker is a kind of subset in which we can save leads. It is used to categorize the leads and enquiries on the basis of sources it has been obtained from or on the basis of theme of the lead/enquiry. For example in below snap we can see that we have made the following trackers:-
- AMC (Annual Maintenance Charge)
- Enquiry
- India Mart Leads
- Product AMC
- Service Calls
All these trackers serve different purposes. And in “Innoventry” we can create and delete trackers according to our work flow and requirements.

How to configure trackers?
Step 1: Open the innoventry software and log in with user id, password and company id. Following which the following screen appears.

Step2: Click on the tab “Application” (highlighted with yellow in above snap) and then select the “CRM” option as shown following which the following screen will appear.

Step 3) Click on Master–>More–>Tracker. Following screen appears:-
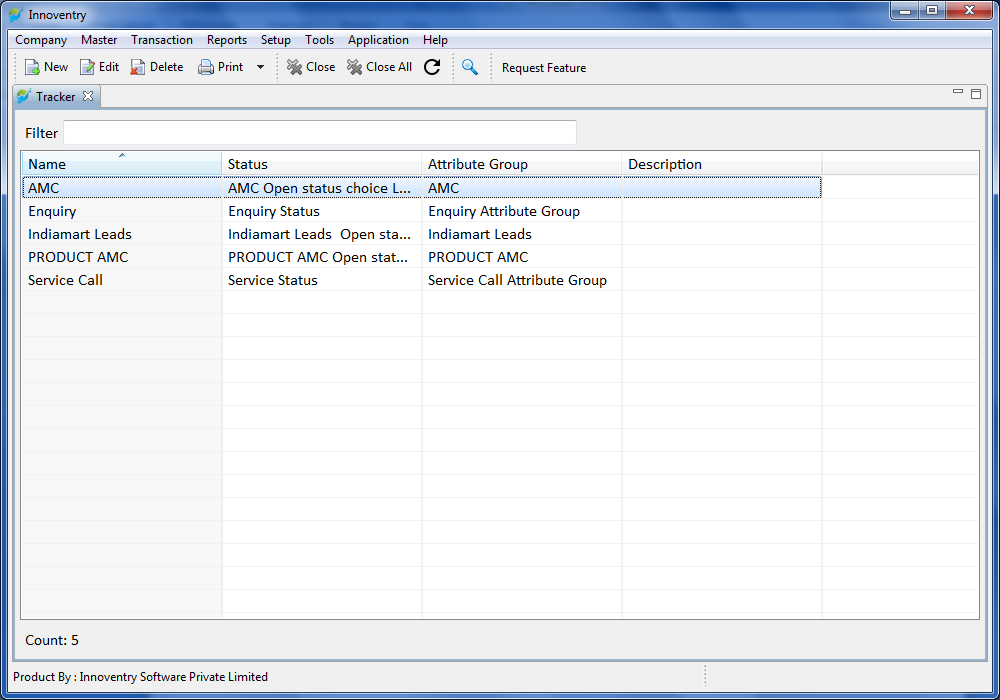
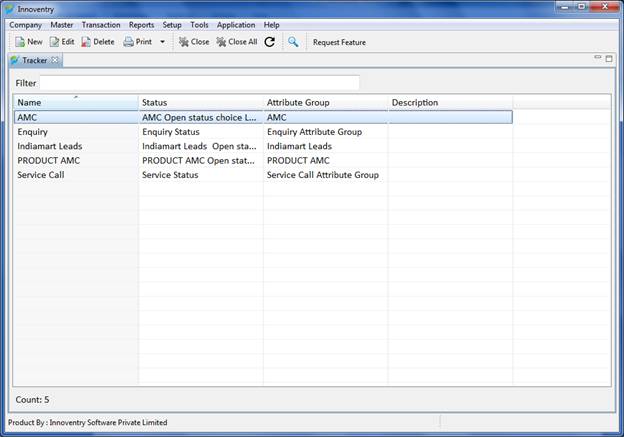
The above screen gives all the trackers created by the user. From this screen we can configure trackers i.e. Adding, Deleting and Editing a tracker.
Start the workflow and its process:-
Work flow of a business is the model on which the business is based on, i.e. the steps involved in completing of the deal between the client and the company.
Tracker can be created to suit up the particular business in “Innoventory” which allows amazing customization options.
Taking example of a software company:-
Steps involved will be:-
When deal is open
- New
- Pending
- Demo Scheduled
- Demo Delivered
- Hold
- Price Negotiation
When deal is closed
- Completed
- Rejected
Hence we can add a tracker involving this work flow as follows.
Step 1: Open the innoventry software and log in with user id, password and company id. Following which the following screen appears.
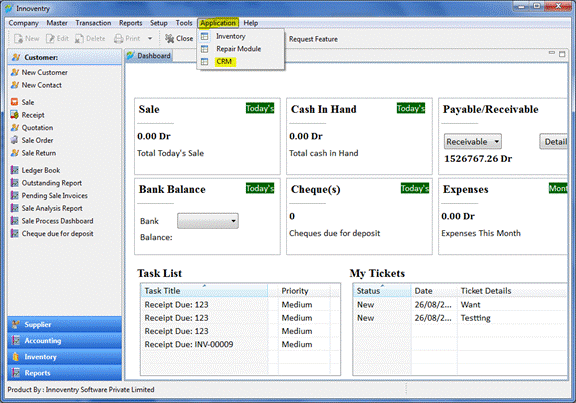
Step2: Click on the tab “Application” (highlighted with yellow in above snap) and then select the “CRM” option as shown following which the following screen will appear.
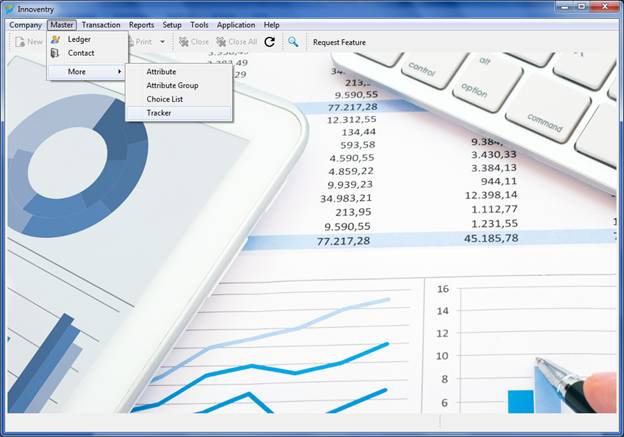
Step 3) Click on Master–>More–>Tracker. Following screen appears:-
Step 4:- Click on “New” option on top of screen left hand side. Following screen appears:-
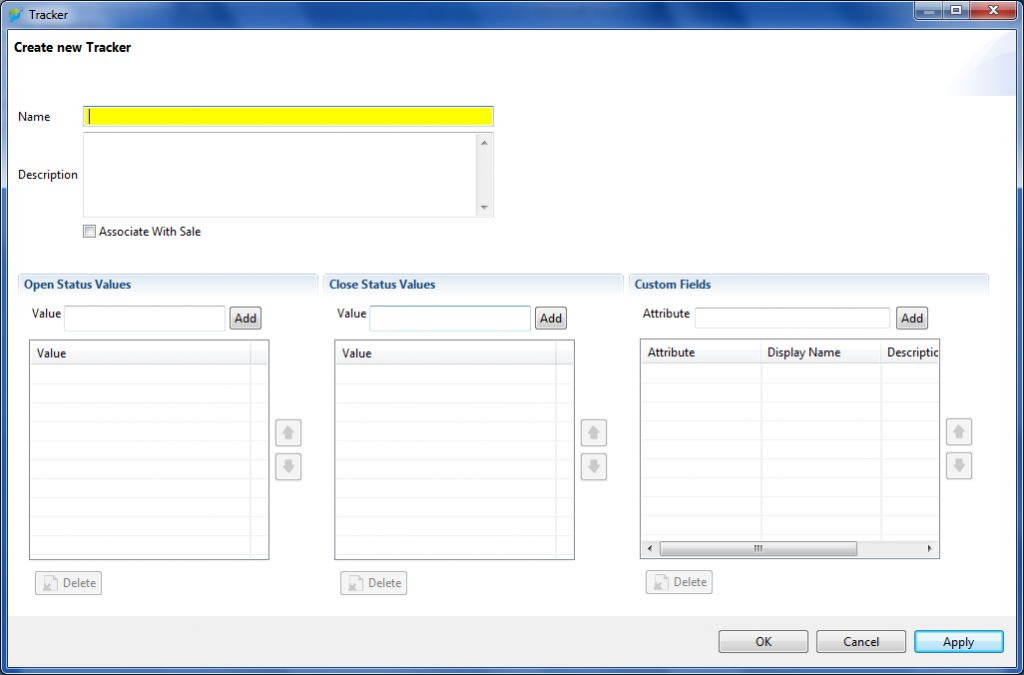
Follow steps A,B,C,D,E:-
A) Type the Name you want to give to tracker. Ex- XYZ Software
B)Write brief description of the tracker. Ex- Shoe store software
C) Add open status values according to the workflow. Example-
- New
- Pending
- Demo Scheduled etc.
These can be added simply by typing them one by one and after that clicking on the “Add” Button.
D) Add closed status values according to the workflow. Example-
- Completed
- Rejected etc.
E)Here we can add custom fields from the drop down menu after clicking the text box. There are a set of pre defined field already fed. But in case you need a unique field, you can add that too by typing it and pressing “Add” Button.
These can be added simply by typing them one by one and after that clicking on the “Add”Button.
Step 5:- After filling up this information screen will appear something like this:-
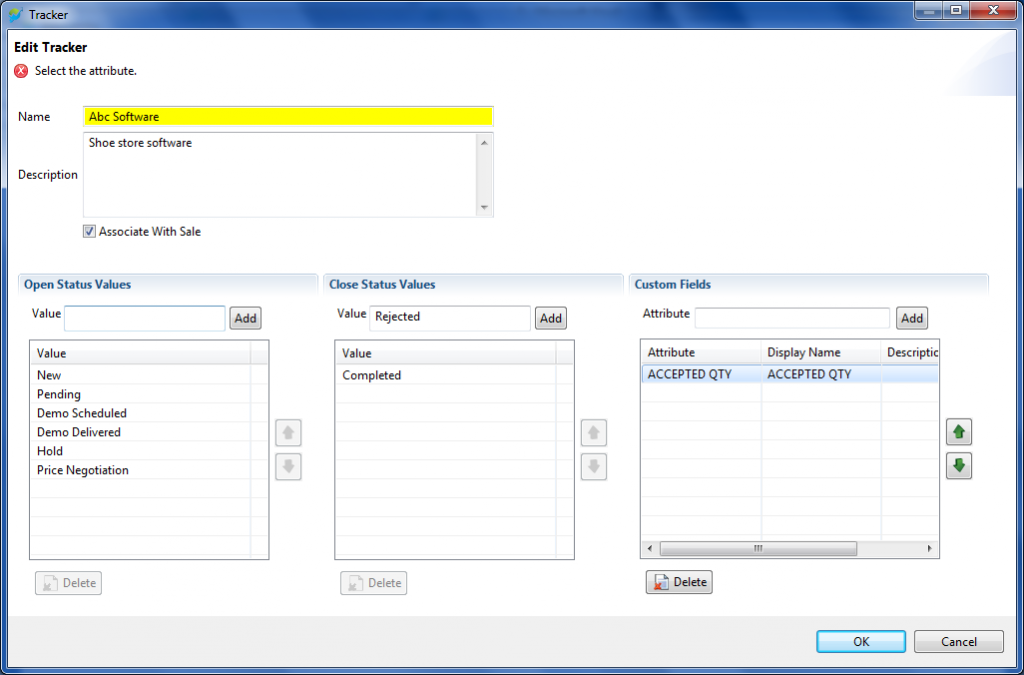
Step 6:- Then Click “OK” tab and hence the tracker is generated.
Dashboard and reports:-
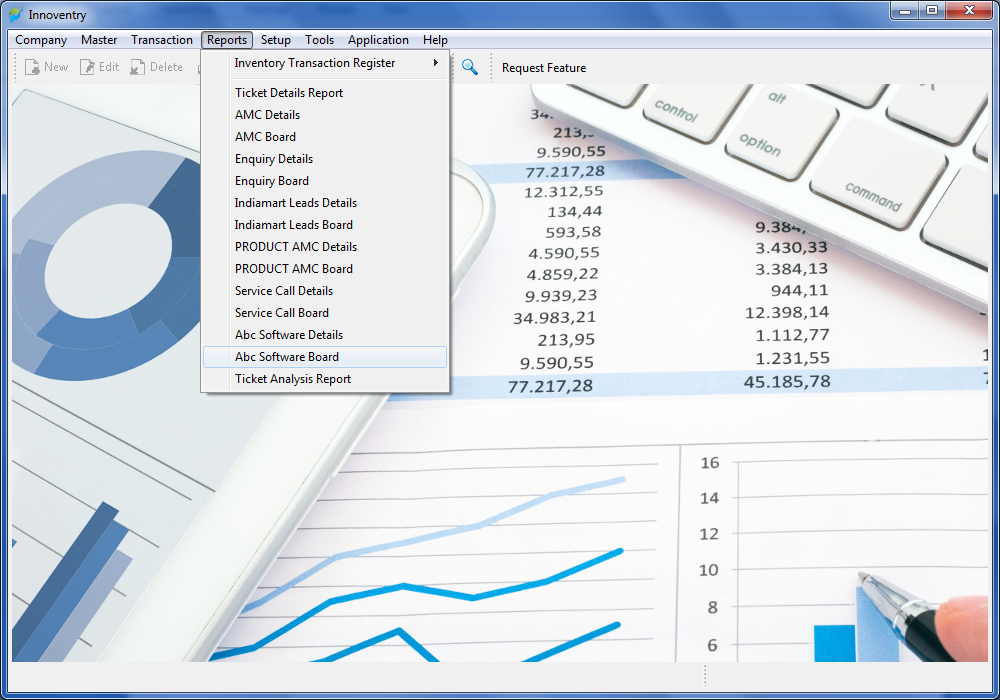
We can see the status of a ticket raised on a tracker using the dashboard option in the reports menu.
We can access the dashboard for all the trackers respectively as follows:-
For Ex- For Abc Software leads:-
Step 1: Open the innoventry software and log in with user id, password and company id. Following which the following screen appears.

Step2:- Following screen appears. Click on the Reports–>Abc Software Board.
Step3:- Following screen appears:-
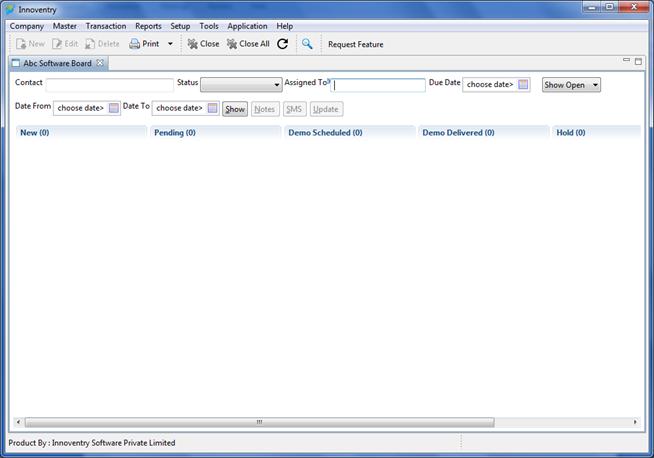
Note:- After generation of tickets, the tickets are segregated under different stages according to the status of the ticket. After updating status, the tickets are shifted from one stage to another accordingly. This helps to keep a track of the tickets at one glance. The tickets are also color coded according to the due date for ease of reference.
- Blue Color- Indicates that due date is more than a week away.
- Light Green Color- Indicates that the due date is this week.
- Red Color – Due date is already over.
- Orange Color- Due date is today.


